
“Hello World!” is the Simplest Program in every programming language. It was first introduce in BCPL programming While C was under Development. The Author of that programming language wanted to Print Some Greeting in his first programs and they seems to print “hi” is somewhat short word on the terminal, so the phrase “hello, world!” was originally introduced as a slightly longer greeting that required several character constants for its expression.
So Here, today we are going to write our first Android “Hello World!” Application. So Formally Speaking that in this “ Hello World !” Program we are not going to write “Hello World!” anywhere because my favorite and lovely google has already did it for all its android developers. That is “Hello World!”.
So Just Fire up your Eclipse,
go to Menu File-> new->Android Application Project.
If it is not there then go to File->New->other…->Android and then select Android Application Project and click on Next.
Then you’ll see the following screen.
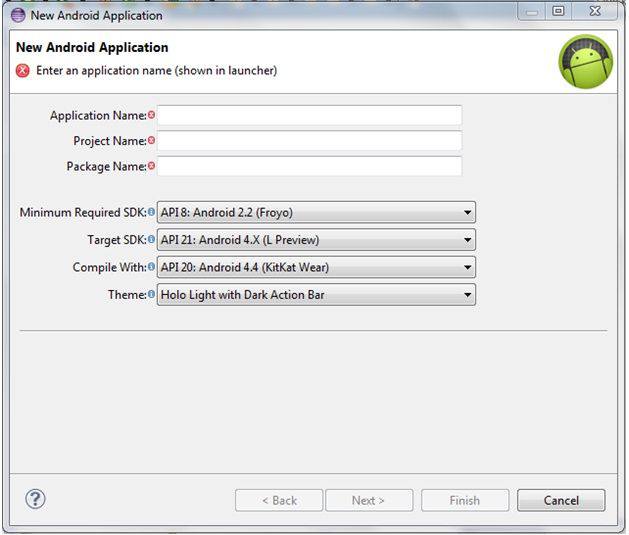
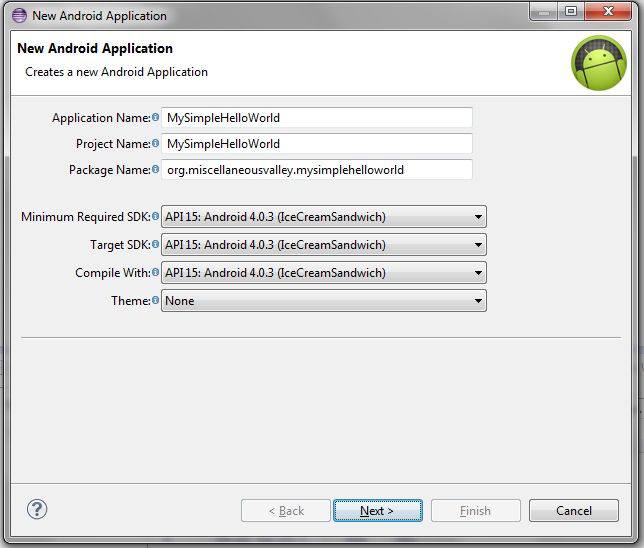
Application Specification
Application Name:-MySimpleHelloWorld
Project Name:-MySimpleHelloWorld
Package Name:-com.miscellaneousvalley.mysimplehelloworld
Minimum Required SDK:- API 15: Android 4.0.3. (IceCreamSandwich)
Target SDK:- API 15: Android 4.0.3. (IceCreamSandwich)
Compile With:- API 15: Android 4.0.3. (IceCreamSandwich)
Theme:- None
Make sure you should not get any warning at the top of that new project wizard and should be appear very clear. Mine is look like this.
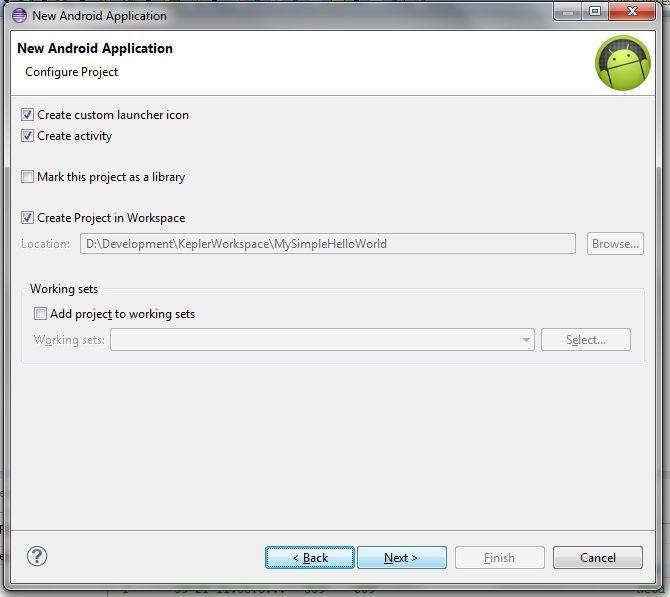
Now click on next it will to configure your project like if you want to create your application’s custom launcher icon and want to Create Activity within a newly created project. If you keep those as they are (simply selected by default) then in next step it will ask you for these all configuration. You will also be asked whether you want to save your project in current workspace or in different one and will look like this.
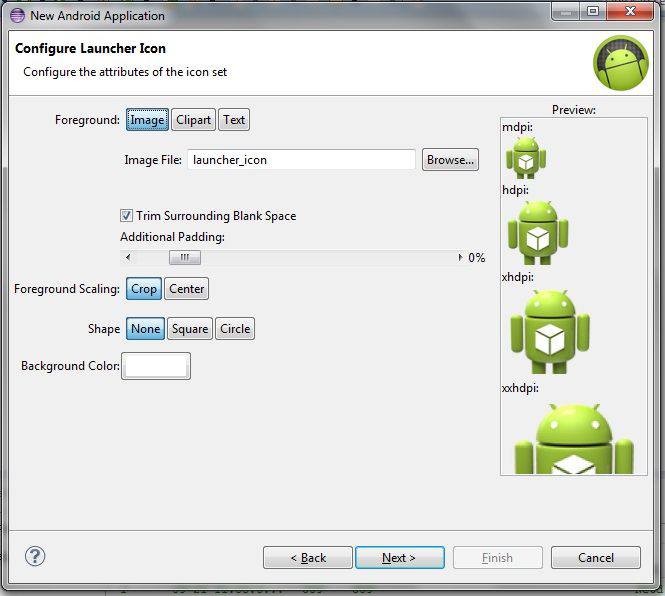
By pressing next you’ll get a custom launcher icon wizard where you can select
- Icon’s Foreground like Image or clipart(predefined icons by android) or text
- Trim around image or padding(same like html/css property)
- Foreground scaling which you can crop or put it in center
- It will let you choose three types of shapes of icon none, circle (old) or square (very old).
- You can choose background color also if you have chosen square or circle shape then you can see that chosen color.
- If you’ve chosen your icon’s foreground as a clipart or text instead of image then you’ll get last option as for foreground color.
- It will also provide you preview as you change all your icon’s any type of properties.
So I’ve chosen simple icon and all remaining things are default will be like following.
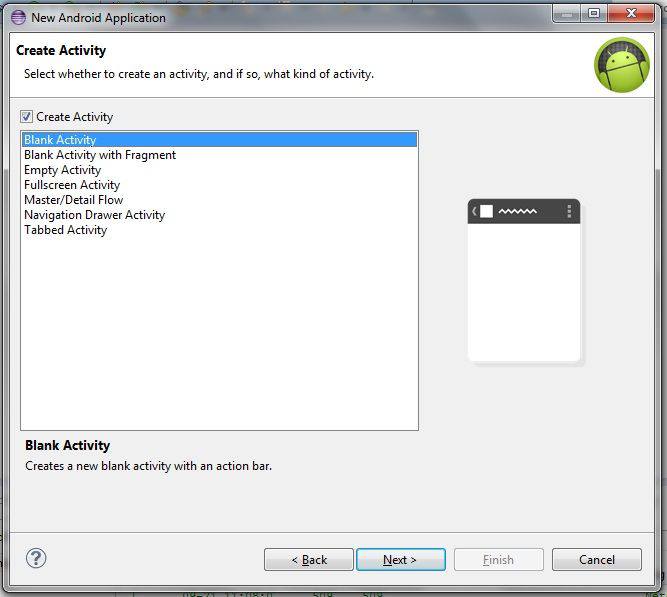
If you’ve selected create activity in the project configuration wizard as I did then it’ll show the create activity wizard in which you can decide whether you want to create a new activity or not if you unselect the checkbox then it will give you finish button directly to create your project else it’ll give you several options for different types of activities like.
- Blank Activity Create a new activity with action bar.
- Blank Activity with Fragment Creates a new activity, with action bar which also contained fragment.
- Empty Activity Creates a new empty activity.
- Fullscreen Activity Creates a new activity that toggles the visibility of the system UI (e.g. status bar and navigation bar) and action bar upon user interaction. Like any Full Screen Game Application.
- Master/Detail Flow Creates a new master/detail flow, allowing users to view a collection of objects as well as details for each object. This flow is presented into two columns on tablet-size screens and one column on handsets or small screens. This type of template will create two activities (i) a master fragment and (ii) a detail fragment.
- Navigation Drawer Activity Creates a new Activity with a Navigation Drawer.
- Tabbed Activity Creates a new blank activity, with an action bar and navigational elements like tabs (old style) or horizontal swipe (new style) for navigation between activities.
Here, I’m going to select blank activity as follow
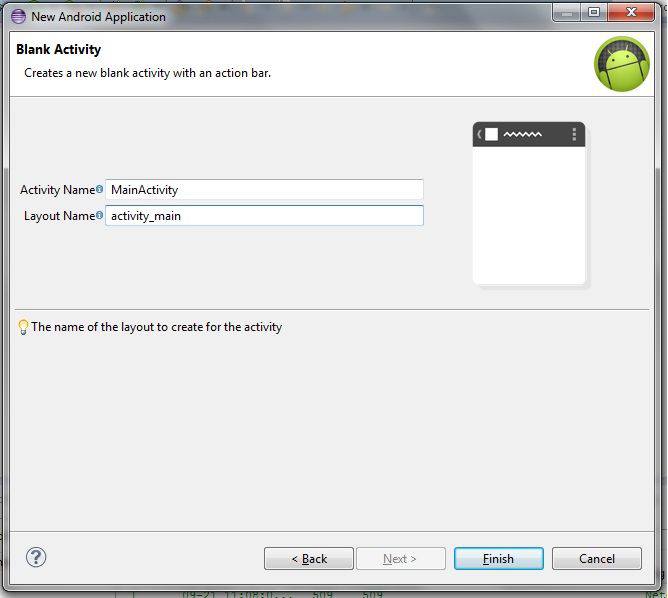
By click on next it’ll popup an Activity configuration wizard in which you’ll have to Provide Name for your designing xml file and attached Java source File.
- Activity Name is the name of the Activity class (or a child class of Activity class )
- Layout Name the name of the layout to create for the activity( xml design file).
I give Activity Name as MainActivity which will create MainActivity.java file and Layout Name as activity_main which will create activity_main.xml file. And make this Activity as Main or Launcher Activity automatically.
Over… Click on Finish and eclipse will create your project according your selected configuration and also it will open two files in eclipse perspective, MainActivity.java and activity_main.xml with two views graphical view and xml view. You can see in the layout file there is Hello World! Label is available by default so as I said previously we are not going to write “Hello World!” anywhere in application.
Now Launch your created AVD by clicking on AVD icon given in tool bar or go to Menu Window -> Android Virtual Device Manager. It will show you the AVD Manager Wizard.
We’ve create application as API level 15 so I’ve also create an AVD as same to that level. So select your appropriate AVD and click on start button given in right side panel. When you click on start it will ask you for select AVD launching Option in that you can select your screen size in inch and as your monitor density pixel. My screen size is 15.6 and Resolution is 1366 x 768 so I’m selecting that and press ok. In my case dpi is 100. You can select wipe user data to launch your AVD as default newly created phone click on Launch button and wait for AVD to launch successfully.

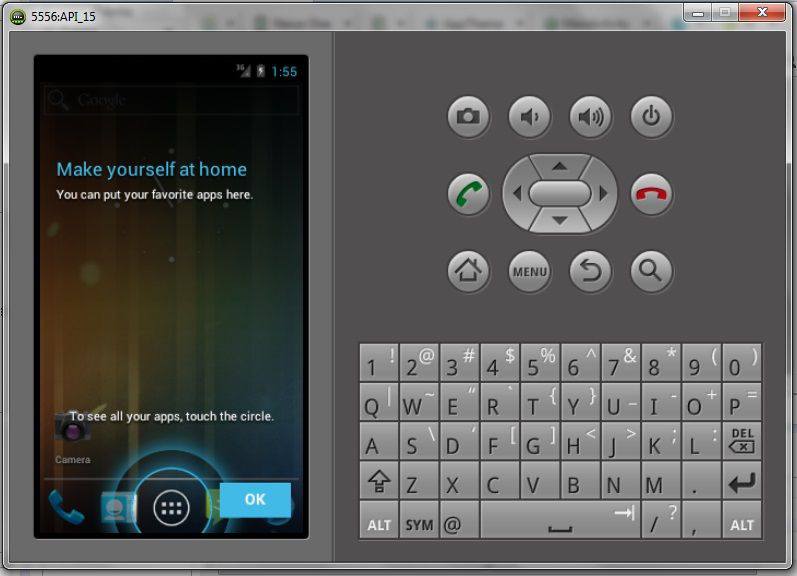
After successful Launch of AVD it will look like this.
To run you application go to eclipse right click on your project folder in left side panel named project explorer then
Run As… -> Run Configurations

Go to Target tab and select the first radio button for Always prompt to pick a device so it will let you choose your running AVD (or even a real device if connected). So new click on Run Button and you well get an android Device Choose where you can select your device.
Select your suitable online emulator and hit OK and all you done. That’s it. Here you go.
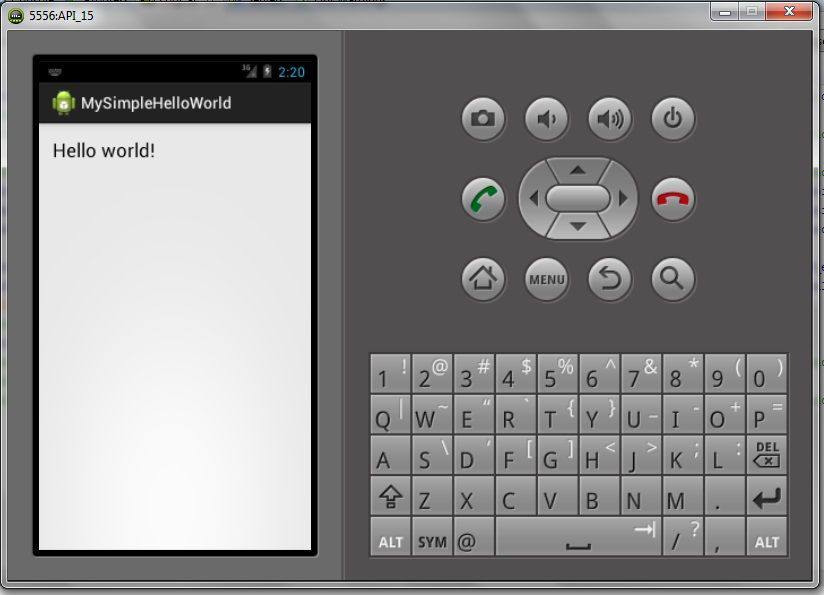
A simple Hello World in android using Eclipse.